Showing posts with label Sensorial Materials. Show all posts

Saturday, 24 November 2018

The Sensorial Materials ~ The Colour Boxes

The Montessori classroom is divided into five disciplines or subjects - Practical Life, Sensorial, Language, Arithmetic and Culture.  Each discipline has a number of interesting and attractive activities which follow a sequence.  Activities in each discipline are organized from the earliest/easiest activity to the most complex.

The activities in the Sensorial area of the classroom help the child sort out sense perceptions.  Maria Montessori created many varied activities which highlight sight, touch, taste, smell and hearing.  The Colour Tablets are one such activity which help develop the child's visual sense, the perception of colours.  This includes differences in hues and intensities.  This material is composed of three boxes.

Colour Box 1

Colour Box 1 contains the primary colours red, blue and yellow.  There are 6 tablets in all.


Colour Box 1

The Montessori teacher invites the child to take the box to a mat.  The teacher will remove all tiles from the box and place them in a random arrangement on the mat.  The teacher will demonstrate the proper way of holding the tablets by the white wooden edges.  The teacher will select one tablet and compare it to the others to find a match.  This will be done for all tablets.  The child is then invited to work with the material.


Colour Box 1 provides the child with the opportunity to pair items and identify colours.  Once the child can match the tablets, language and games will be introduced.  When the child is able to identify the colours, s/he will be introduced to Colour Box 2.

Colour Box 2
Colour Box 2 contains the primary and secondary colours along with brown, black, white, grey and pink.  The box contains 22 colour tablets.


Colour Box 2

The presentation of Colour Box 2 follows the format of Colour Box 1.  The teacher will remove the primary colours red, blue and yellow from the box and ask the child to pair them.  If the child is able to pair them, the teacher will introduce the orange, purple and green tablets and invite the child to pair them.  The final colours will be pink, white, brown, black and grey.  After all the tablets have been paired, the child is invited to pair all of the tablets independently.


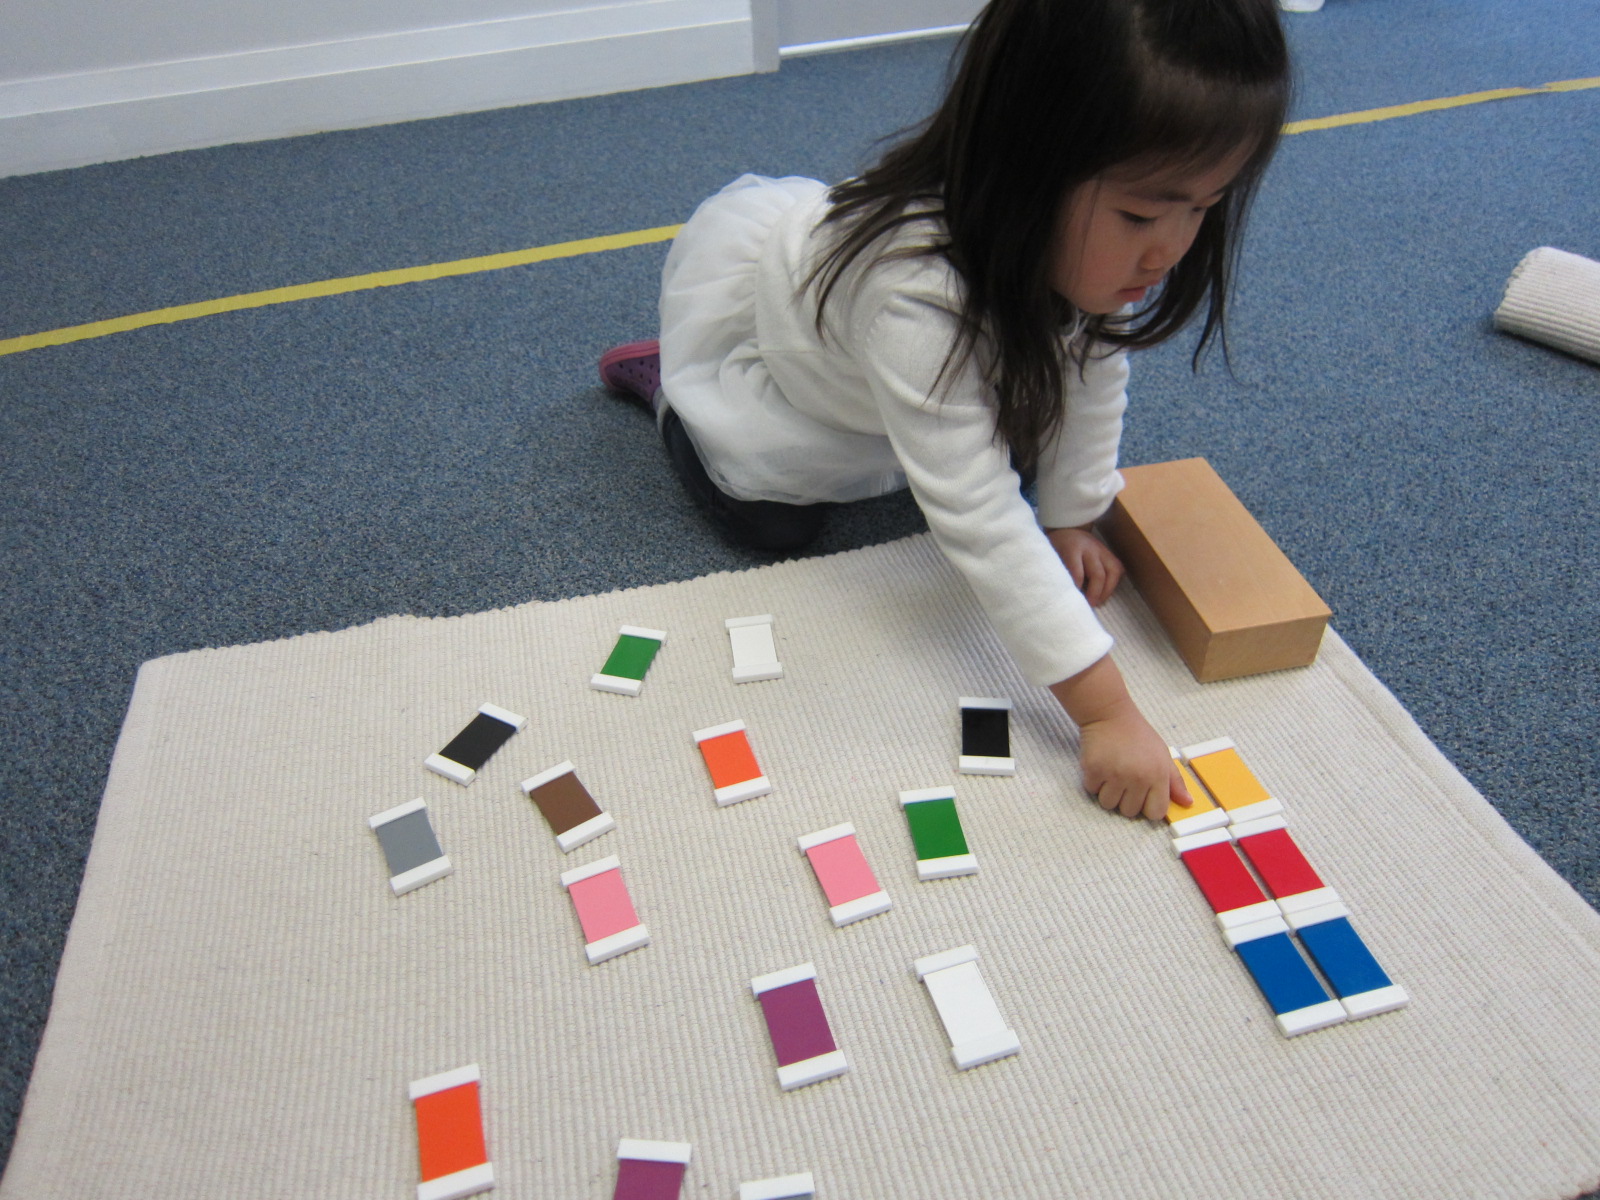


Colour Box 2 provides the child with the opportunity to pair items and identify colours.  Once the child can match the tablets, language and games will be introduced.  Games include finding objects in the room that match the colours of the tablets, and pairing tablets from across the room.

When the child is able to identify the colours, s/he will be introduced to Colour Box 3.

Colour Box 3

Colour Box 3 contains 7 shades of nine colours - red, blue, yellow, green, purple, orange, pink, brown and grey.  There are 63 tablets in all.  The box is divided into 9 separate compartments.  Each compartment contains seven different intensities of one hue. 


Colour Box 3

The presentation of Colour Box 3 follows the format of the previous two boxes.  The teacher will select one colour and remove all 7 tablets of that hue.  They are placed on the mat randomly.  The teacher will begin with either the very darkest or the very lightest intensity of the hue.  The teacher will then find the next darkest intensity of the hue by comparing the tablet with the rest.  This will continue until all of the tablets have been placed in order.  The child is then invited to choose a colour and grade the tablets.


The teacher will introduce the language - light, lighter, lightest  and dark, darker, darkest - for each colour.  The child is invited to continue grading other colours and will be introduced to games with this material.

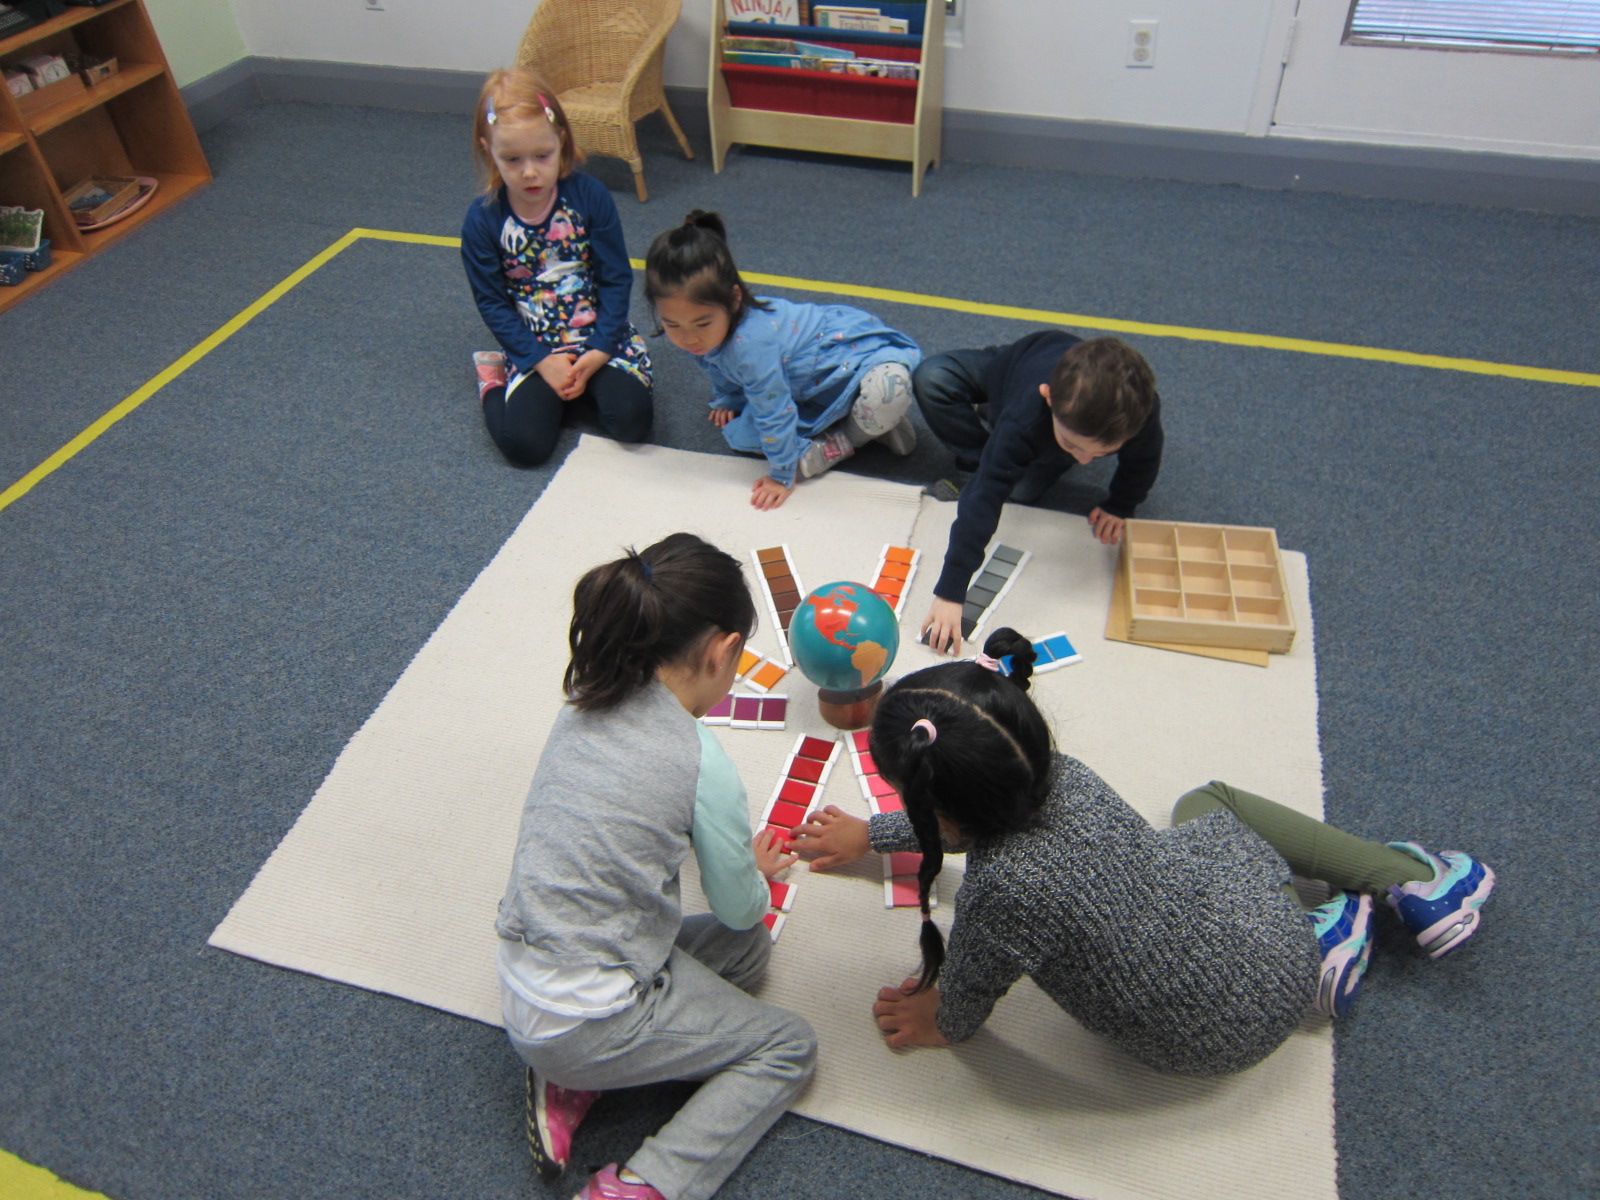
In our classrooms, the children particularly enjoy working together to grade all of the tablets.  This is one of the extensions of Colour Box 3.


Colour Box 3 enables the child to further refine their visual sense.  The tablets in each section illustrate the subtle differences in one colour.  Things can be blue, but also dark blue or light blue.  The gradations of colour make a difference and are visible in the beautiful and colourful world around us.

Saturday, 11 April 2015

The Joy of Concentration

When prospective parents come to visit our little yellow school, a large majority comment on the calmness of the children in the classrooms.  Each of our classroom communities consist of upwards of fifteen children aged three until the year they turn six.  Surely, this would make for a very chaotic and loud environment.  Not in a Montessori school.  What people see are classrooms filled with calm and happy children engaged in their 'work'. 

Over one hundred years ago, Maria Montessori wrote:

The first essential for the child's development is concentration.  The child who concentrates is immensely happy.  

This continues to hold true so many years later.  A child engaged in meaningful work is immensely happy.  Each day brings many examples of this.  Here are some photographs of a few of the children working in the classrooms.  They were so engaged in their work that they were not aware that I was taking pictures of them.

Four year old V. is working with the Pink Object Boxes.  The Pink Object Boxes contain two and three letter phonetic words.  V. has set out the objects found within the box and is reading each word card.  She then matches the word to the corresponding object.


Four and a half year old P. and four year old I. are working with an extension of the Cylinder Blocks.  The Cylinder Blocks vary in height, diameter or both.  The children work with them individually.  Working with all four is a later extension. The Cylinder Blocks have many aims - to help develop the child's visual discrimination of size, indirectly to prepare the child for writing through the handling of the cylinders. The photographs do not show that they did complete all four of the cylinders.


Three year old S. is a very determined little girl.  Here she is working with the Sandpaper Letters and the Sandpaper Tray filled with red lentils.  Cornmeal or sand can also be used. The Sandpaper Letters help the child associate the sounds of speech with their written symbol.  They are preparation for writing and reading.  S. knows all of her sounds and was very motivated to learn how to write her letters.  These photographs show her tracing the 'h' Sandpaper Letter.   She then reproduces it in the tray.  


Although they are very young, the children are capable of so much.  I count myself lucky to be around their determination and enthusiasm for learning.

Monday, 17 November 2014

The Sensorial Materials ~ The Sound Cylinders


The Montessori casa classroom is organized into five disciplines or subjects - Practical Life, Sensorial, Language, Arithmetic and Culture.  Each discipline has a number of interesting and attractive activities which follow a sequence. Activities in each discipline are organized from the earliest/easiest activity to the most complex.

The activities found in the Sensorial area of the classroom help the child sort out sense perceptions.  Maria Montessori created many varied activities which highlight sight, touch, taste, smell and hearing.  The Sound Cylinders are one such activity which help develop the child's auditory sense.  It is a very popular piece of material in our classrooms.

The material consists of two wooden boxes, one with a red lid and one with a blue lid.  Inside each of the boxes are six hollow cylinders made out of wood with non-removable lids. Each cylinder contains granular material that make a different pitch and volume of sound when shaken.  Each cylinder in the red box has an identical match in the blue box.


The Sound Cylinders


When a child works with these materials, the red cylinders are placed on the left.  The red cylinders act as the control. The blue cylinders are placed on the right and are matched with a corresponding red cylinder.  This work can be done on a mat or on a table.


The child is ready to begin matching the Sound Cylinders.

The child chooses a red Sound Cylinder closest to him.  He holds it a few inches from one ear and gives the cylinder two sharp shakes downward while listening to the sound it makes.  


Shaking a Red Sound Cylinder

The child then takes a blue Sound Cylinder, holds it close to his ear and gives the cylinder two sharp shakes downward. The child is trying to match the sound of the red Sound Cylinder.

Looking For a Match

The child continues shaking the red Sound Cylinder and each blue Sound Cylinder until a match is found.


When a match is found, the child places the matching pairs in the centre of the two rows of cylinders.


Pairing the Sound Cylinders

All Sound Cylinders Are Matched

Matching the sounds is the first exercise presented with the Sound Cylinders.  There are many extensions that can be done with the Sound Cylinders  - grading the cylinders from loudest to softest and vice versa, placing the cylinders on two separate mats in the classroom a distance away from each other and isolating one sound, isolating sounds and asking for the next louder or the next softer.

In Winter 2014 we graded the Sound Cylinders during our circle time.  Twelve children were given a Sound Cylinder.
The children with red Sound Cylinders lined up on one line and the children with the blue Sound Cylinders lined up on the other line.
  

Each child is holding a Sound Cylinder.

In the photograph, E. (who recently graduated from our program and is currently in grade one) is looking to match her red Sound Cylinder with the corresponding blue Sound Cylinder.  She shakes her red cylinder in front of a child with a blue cylinder.  The child with the blue cylinder shakes his/her cylinder.  She continues down the line until she finds a match.  When a match is found, the children stand in the centre between the two lines.


Looking For a Match

All of the Sound Cylinders have been matched.


All of the  Sound Cylinders have been matched.


We all had a lot of fun that day working collectively with the Sound Cylinders.

Wednesday, 14 August 2013

Sensorial Materials - The Pink Tower

The Pink Tower is part of the Sensorial area of the Montessori classroom.  This area of the classroom helps to develop the child's senses.  The Pink Tower is an early Sensorial exercise.  The main purpose of this material is to help develop the child's visual discrimination of differences in three dimensions.  It also helps in the development of fine muscular coordination.


N. is building The Pink Tower

This material consists of ten pink wooden cubes varying in size and differing equally in all dimensions by one centimetre.  The child is asked to bring The Pink Tower to a mat.  Each cube is taken individually and placed randomly on a mat.  The teacher then begins to build the tower vertically beginning with the largest cube.  Once the tower has been built, the child and teacher examine the tower from all sides. The tower is dismantled cube by cube.  The child is then offered a turn.